Introduction to Water-Cooled PCs
If you’re an enthusiast looking to push your PC’s performance to the maximum while maintaining optimal temperatures, building a water-cooled PC is an excellent solution. Water cooling is more efficient than air cooling, providing better thermal performance especially useful for overclocking CPUs and GPUs. This guide walks you through the steps to build a water-cooled PC from scratch.
Why Choose Water Cooling?
Water cooling offers several advantages over traditional air cooling:
- Superior heat dissipation
- Quieter operation
- Enhanced overclocking potential
- Aesthetic customization
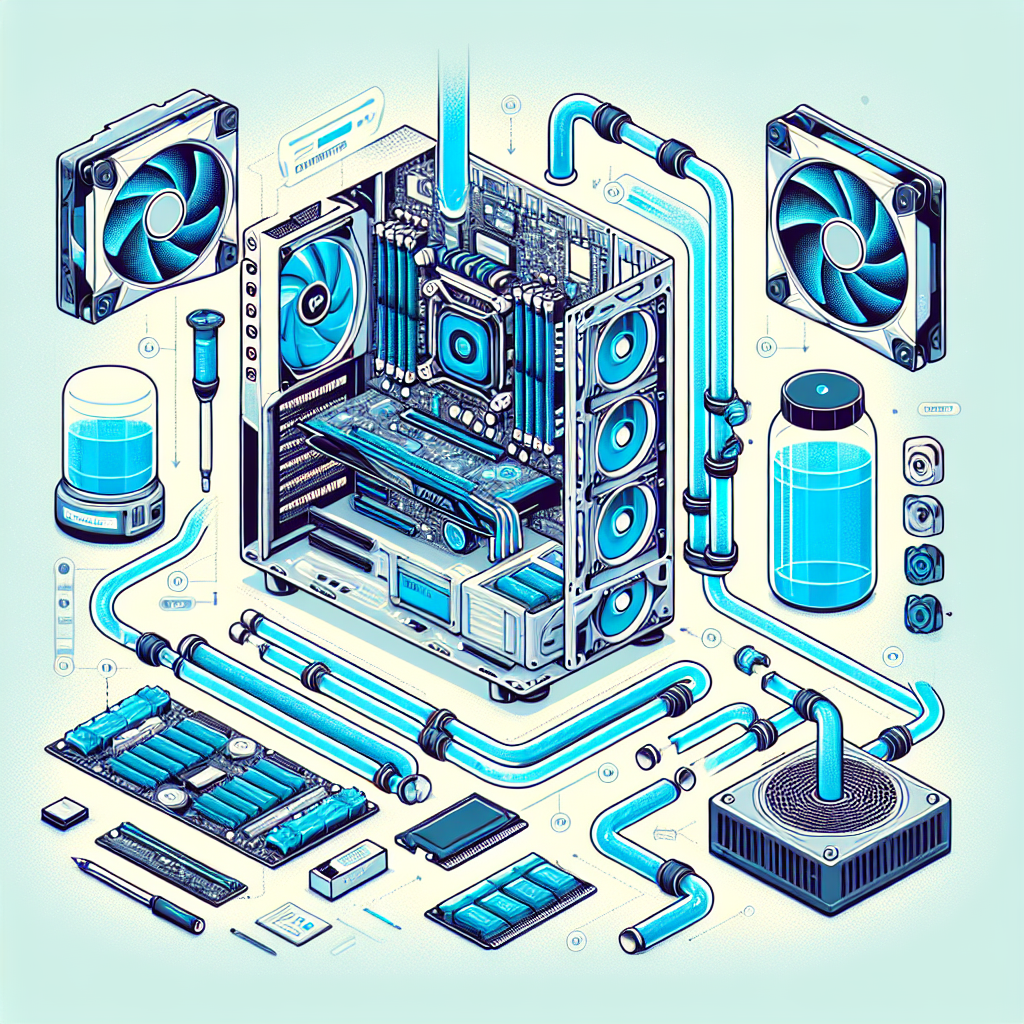
Essential Components for Water-Cooling System
Before diving into the build process, ensure you have all necessary components:
| Component | Description |
|---|---|
| Radiator | Dissipates heat from the liquid. |
| Water Block | Mounted on the CPU/GPU to absorb heat. |
| Pump | Makes liquid circulate through the system. |
| Reservoir | Holds extra liquid and helps remove air bubbles. |
| Tubing | Connects all components to circulate the fluid. |
| Fittings | Connects tubing to components securely. |
| Coolant | Specially formulated liquid for thermal transfer. |
Step-by-Step Guide to Building a Water-Cooled PC
Step 1: Planning and Research
Determine the layout and components you need based on your PC case size and cooling requirement. Making a detailed plan ensures you don’t encounter issues halfway through.
Step 2: Gathering Supplies
Gather all the components listed in the table above. Ensure compatibility and measure the interior of your case to confirm everything will fit.
Step 3: Preparing the Case
Disassemble your case as per the manufacturer’s instructions. Remove panels, drive bays, and any obstacles that could interfere with your water-cooling setup.
Step 4: Installing Radiators
Install radiators in optimum positions as they will be critical for heat exchange. Mount them securely using screws or brackets provided.
Step 5: Mounting the Water Blocks
Mount the water blocks on the CPU and GPU. Use thermal paste to ensure good contact between the block and the processing units.
Step 6: Installing the Pump and Reservoir
Position the pump and reservoir in a place where they are easily accessible. Make sure the reservoir is higher than the pump to prevent dry running.
Step 7: Connecting Components with Tubing
Measure and cut the tubing to run between the radiator, water blocks, pump, and reservoir. Ensure tight fits using appropriate fittings to prevent leaks.
Step 8: Adding Coolant
Fill the reservoir with coolant, allowing the liquid to circulate and shift any air bubbles. Use a pump test feature if available to run the system and check for leaks.
Step 9: Leak Testing
Before powering on your PC, run the pump alone for several hours to ensure there are no leaks. If you find any, fix them immediately before proceeding.
Step 10: Final Assembly
Once assured of no leaks, reassemble your case and arrange the cables neatly. Double-check component connections and ensure everything is secured properly.
Maintenance Tips
To ensure longevity and performance, follow these maintenance tips:
- Check coolant levels regularly
- Inspect for leaks monthly
- Replace coolant every 6 to 12 months
- Clean the radiator to remove dust and debris
Conclusion
Building a water-cooled PC requires careful planning and precision. However, once completed, it offers unparalleled cooling efficiency and performance. Follow these steps accurately to build your dream water-cooled PC and enjoy the benefits of advanced thermal management.